Friday, August 10, 2018

Run Powershell Script on Windows 10

Executing PowerShell script is always easy on Windows but when it comes to Windows 10, it a little bit tricky and need additional attention.

On Windows 10, have different Execution Policies. 

Detailed docs can we found on Microsoft Docs 


The PowerShell script execution policies enable you to determine which Windows PowerShell scripts (if any) will be allowed to run on your computer. Windows PowerShell has four different execution policies:

Execution Policy
Description
Restricted
No PowerShell scripts can be run. Windows PowerShell can be used only in interactive mode. This means that you can only run individual commands. You can't run scripts under this policy, regardless of where the scripts came from (local or downloaded) and whether they are signed.
AllSigned
Only PowerShell scripts signed by a trusted publisher can be run. When you attempt to run a signed script, you'll receive a prompt asking you to confirm that you trust the publisher.
RemoteSigned
Downloaded PowerShell scripts must be signed by a trusted publisher before they can be run. Scripts that you run from the local computer don't need to be signed. There are no prompts when you attempt to run a script.
Unrestricted
No restrictions; all PowerShell scripts can be run.
Undefined(default)
No execution policy has been set.

You can set an execution policy that is effective only in a particular scope.

By default or if you are getting error to execute powershell Sctipt as below then you need to setup execution policy to unrestricted or something like that as per need.

File C:\Scripts\testScript.ps1 cannot be loaded because running scripts is disabled on this system. For more information, see about_Execution_Policies at http://go.microsoft.com/fwlink/?LinkID=135170


To Run PowerShell script just select unrestricted scope for current user

Set-ExecutionPolicy Unrestricted -Scope CurrentUser -Force -Verbose


Saturday, April 8, 2017

HP Pavilion X360 Wireless Issue Solved

I have got a new HP Pavilion 13 x360 and installed Ubuntu 14.04 and I'm having issues with wireless. I've  got many solution however nothing worked for me.

One of the solution worked, so keeping it on my blog so that others can take advantage of it, here is the info of hardware as well as the solution.

Network Hardware Info:
sudo lshw -C network
description: Wireless interface
product:
Wireless 3165
vendor: Intel Corporation
physical id: 0
bus info: pci@0000:01:00.0
logical name: wlan0
version: 81
serial: 84:ef:18:8b:89:1d
width: 64 bits
clock: 33MHz
capabilities: pm msi pciexpress bus_master cap_list ethernet physical wireless
configuration: broadcast=yes driver=iwlwifi driverversion=4.4.0-31-generic firmware=16.242414.0 ip=192.168.1.100 latency=0 link=yes multicast=yes wireless=IEEE 802.11abgn
resources: irq:280 memory:b1400000-b1401fff


Issue with firmware, Need to download it from web
Please download this to your desktop

https://wireless.wiki.kernel.org/_media/en/users/drivers/iwlwifi-7265-ucode-25.17.12.0.tgz
Right-click it and select 'Extract Here.'
Now, open Terminal and guide to the extracted folder, Run below commands

cd ~/Desktop/iwlwifi-7265-ucode-25.17.12.0
sudo cp iwlwifi-7265D-12.ucode /lib/firmware/iwlwifi-3165-9.ucode
sudo cp iwlwifi-7265-12.ucode  /lib/firmware/iwlwifi-3165-12.ucode
After all this, just blacklist acer-wmi to ignore loading of acer-wmi and hp-wmi.
sudo -i
modprobe -r acer-wmi
echo "blacklist
acer-wmi"  >>  /etc/modprobe.d/blacklist.conf
exit
And @ last reboot system.
I hope this will work for all

Monday, July 29, 2013

Install and Configure SNMP on Ubuntu


Installation of SNMP service on Ubuntu  is little different in comparison to red-hat base systems. There are simple steps to install and configure but first important thing is which package is equivalent to which package in Debian Repository, there are two packages named snmp and snmpd. snmp is the client tools and snmpd is server.
so lets start the installation

sudo apt-get install snmpd snmp

Only by this snmp will be installed on the system, now its time to configure it.

Configuration
Now Rename the Original SNMPD configuration file

sudo mv /etc/snmp/snmpd.conf  /etc/snmp/snmpd.conf.org

then create new configuration file

sudo vim.tiny /etc/snmp/snmpd.conf

and copy this content to that file

rocommunity  public
syslocation  "India"
syscontact  dexterdgeek@gmail.com


Make snmpd use the newly created file and make it listen to all interfaces:

Edit /etc/default/snmpd

Change from:
# snmpd options (use syslog, close stdin/out/err).
SNMPDOPTS='-Lsd -Lf /dev/null -u snmp -I -smux -p /var/run/snmpd.pid 127.0.0.1'

To:
# snmpd options (use syslog, close stdin/out/err).
#SNMPDOPTS='-Lsd -Lf /dev/null -u snmp -I -smux -p /var/run/snmpd.pid 127.0.0.1'
SNMPDOPTS='-Lsd -Lf /dev/null -u snmp -I -smux -p /var/run/snmpd.pid -c /etc/snmp/snmpd.conf'

and restart snmpd

sudo /etc/init.d/snmpd restart


Test
Do a snmpwalk from another host against your newly configured host.

snmpwalk -v2c -c public 127.0.0.1

Yes it works!!

Tuesday, July 23, 2013

Monitring Machine


From last fewdays , i was tying to configure a Linux system to monitor my Lab Network and services. There is not any much information available on net. There are few networking tools avalable, so I thought to give them a try and here are tehe details fo them.
I tried these three tools:
1. MRTG
2. Munin
3. Nagios

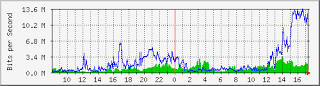
The Multi Router Traffic Grapher, or just simply MRTG is free s/w for monitoring and measuring the traffic load on networklinks. It allows the user to see traffic load on a network over time in graphical form.MRTG uses the Simple Network Management Protocol (SNMP) to send requests with two object identifiers (OIDs) to a device. The device, which must be SNMP-enabled, will have a management information base (MIB) to look up the OIDs specified.

Munin is a networked resource monitoring tool that can help analyze resource trends and "what just happened to kill our performance?" problems. Munin presents output in graphs through a web interface.

Nagios is an open source computer system monitoring, network monitoring and infrastructure monitoring software application. Nagios offers monitoring and alerting services for servers, switches, applications, and services. It alerts the users when things go wrong and alerts them a second time when the problem has been resolved.

I installed this on Ubuntu 12.04. Installation and Configuration steps are in my others posts.
Source: Wikipedia

Friday, November 18, 2011

Upgrade to new release Fedora 16 (Verne)


To upgrade latest version of the Fedora Linux operating system simple process is here which provide update from the older versions of Fedora to Fedora 16

Open the Terminal and install the tool preupgrade by 
        
    yum -y install preupgrade

After installing this tool start it from terminal by using this command 

   preupgrade

then simply follow the instruction

Apply


Forward

After click Forward tool will download the required metadata for upgrade to Fedora 16,
after this reboot the system and complete the installation.


Njoy Fedora 16(VERNE)


Saturday, September 3, 2011

Install Linux and Windows together


Install Fedora and Windows on the same machine 

For those who are using windows and wants to move to Linux, and also for those who wants to make a dual boot, the first question that arises is "can we install windows and linux together" and the answer is YES, you can install linux and windows on the same machine, we call it "Dual Boot". 
The steps for making the machine dual boot is given below, remember one thing, install windows first and then install linux to avoid trouble.


First you need to understand the some basic terms about the file system


    In an hard disk you can only make 4 primary partition (extended partition is included and treated as a primary partition, the partitions inside the exteneded partitions are excluded) So there is an option of a primary and extended partition.


    Windows only understand the NTFS and FAT partition while Linux understand all the partition (you can create a extX partition and put your data there so that others can not see it on windows and you will get a secure partition).


    For installing the Linux, Linux need some specific partition(swap, ext4 with mount point / and /boot).


Now after understanding this terms, time to start the Installation before this you need the Windows CD/DVD and the Linux CD/DVD to install the OS on your machine.


For the Fresh hard disk installation


Firstly install the windows in your machine, during the partition time just create the one partition of NTFS with the minimum drive size as per your windows version


Windows 98/XP 7 GB


Windows vista 10 GB


Windows 7 13 GB


And specially don't do any other partition here.


Now time to install the Linux with your Windows, so we take the example of Ubuntu or Fedora


nearly all the Linux contain the same type of partition table


Boot the System with the boot-able media of Ubuntu or Fedora


and at the time of partition (i.e. In partition table) seems one NTFS partition of windows and the rest is allocated space, follow the steps mention here


    Make the whole space Extended


    Now make the partion in extended space


    1 Partition Type swap with 1 GB(40% of your RAM size)


    2 Next one partition Type ext4 and the Mount Point /boot and the size will be 500 MB (if you are installing your third os after installing windows and linux then you can skip the step of formating the boot partition just use it as it is)


    3 And the third one is also the Ext4 type but with the mount type / with size minimum 20 GB space.


    And in the rest of space make the partion as per your wish but with the type NTFS because if you use something else it will not be accessible in Windows


    Complete the Installation process and Njoy the windows and Linux on the same machine.


    For switching between the windows and Linux, when you start your machine select the as per your required OS form the boot loader.
And Njoy your OS.

Sunday, May 29, 2011

Change the GRUB Menu Timeout on Fedora 14, Fedora 15

Change the GRUB Menu Timeout on Fedora 14, Fedora 15

When your system boots, you will see the GRUB menu, or if you’ve enabled the menu to show by default. The only issue for this is that the default timeout. So you may want to change this timeout. Increase or Decrease the time,both are simple.

Open up the /boot/grub/grub.conf file in any text editor. For this you need Super User Permission
i am using Gedit

   #gedit /boot/grub/grub.conf

Now find the section:

    timeout=0

and now replace the 0. The timeout value is in seconds so replace it some other value
as i want it for 5 seconds, so i used

     timeout=5

And save the file, and when you reboot you will have that many seconds to choose the menu item you want.

Wednesday, March 30, 2011

3 Good Games For Linux


 Three open source games for Linux , I installed the games on Fedora and I Njoyed all,
I liked Supertux perhaps because it is similar to super mario one my favorite games on Video Games, the rest of two games are nice ones also with good graphics.
SuperTux
SuperTux is a classic 2D jump'n run sidescroller game in a style. The game was inspiried by the Nintendo Super Mario Series. The Milestone 1 release of SuperTux features: 9 enemies 26 playable levels Software and OpenGL rendering modes configurable joystick and keyboard input new music completely redone graphics. And it is also a crossplatform.


I tested this game, is funny almost the same as Super mario game
For CentOS & Fedora
                       #yum install supertux
Pingus
Pingus is a free computergame inspired by Lemmings and Created by Ingo Ruhnke.
In this TUX(penguin) instead of lemmings.


For CentOS & Fedora
                        #yum install pingus
Wormux
WarMUX is a free and open-source game. Have the mascots of your favorite free software titles battle it out in the Wormux arena using dynamite, grenades, baseball bats and other bazookas... Exterminate your opponent in a 2D environment with toon-style scenery.
For CentOS & Fedora
                       #yum install wormux

Monday, March 28, 2011

IM Chat Clients Mostly Used

 IM Chat Clients Mostly Used on Fedora

An instant messaging client is a software application 
that enables the user to engage in instant messaging.
Many IM chat clients available to use, but which one is the best choice for you. Basically most of them do the same job for me i usually use Pidgin my favorite one. many IM clients supporting connecting to multiple networks accounts “Hotmail, yahoo, facebook, irc, gmail, ICQ, AIM, myspace, Japper, even more with adding custom API”
  1. PSI IM
    To install any chat client you have to download it from its web site or you can install it through yum on fedora by respective steps
    First you need to Super User (as Root)
    For pidgin
               #yum -y install pidgin

    For empathy
               #yum -y install empathy

    For  Emesene
              #yum -y install emesene

    For PSI
             #yum install psi

    After Installing any of the chat client 
    Njoy the Instant Messaging

Saturday, March 26, 2011

High level language and Low level Computer language

Difference between high level language and low level language

High level languages allow much more abstraction than low level languages. This allows algorithms and functions to be written without requiring detailed knowledge of the hardware used in the computing platform. The compiler provides this interface transparently for the programmer.
 
Examples of high level languages include C, C++, Java, etc.

Low level languages will require more involvement with the actual register and interrupt interfaces to the hardware. This can provide more control and efficiency for the program and can be good for applications which need high speed execution, but high level compilers are much better at optimizing for speed now.


Examples of low level languages include machine language specific to each processor and assembly language specific to each processor.

Source(s):

BSEE and MSEE

Friday, March 11, 2011

Customizing the splash image in Bootloader


Customizing the splash image in Bootloader

The splash image is the image shown in the background when GRUB (the Grub Shell) is displaying the list of operating systems you can boot.
Normally, this is the corporate logo of your Linux distribution. But its very simple to customize it to an image of your choice.
All you need is the GIMP and gzip.
For this you have to follow the simple steps
firsty you need root access and follow the simple steps

1)Start the GIMP.

2)Click on File->New or type Ctrl+N

3)In the new image dialog, change Width to 640 pixels and Height to 480                  pixels. (The image should be of size 640x480 pixels.) Now click OK.

4)Create the image which you would like to be the splash image.

5)After you have finished creating the image,
    hit Alt+i or right click on the image and click on Image->Mode->Indexed...

6)In the Indexed Color Conversion dialog that appears,
    click on the radio button "Generate optimal Palette" and
     in "# of colors" enter 14. Click OK.(The image should be of only 14 colors)

7)Now right-click on the image and click on File->Save As...
     Save the file as  splash.xpm in a directory of your choice.

8)Now open a terminal window and navigate to the directory where you have
     saved splash.xpm

9)Now key in gzip splash.xpm

10)You will find that a file named splash.xpm.gz is created in the directory
     where splash.xpm used to exist.

11)Copy this splash.xpm.gz to the /boot/grub directory.
     You may want to back up the pre-existing splash.xpm.gz file in
      the /boot/grub directory first.

That's it! When you reboot, you will find your image in the background, with the menu of operating systems etc. in the foreground.
Njoy

Wednesday, March 9, 2011

Change Login Screen On Fedora 14


I’ve been doing some tweaks on the machine I set up with Fedora 14 (Laughlin) using Gnome. Things were OK until I decided to change the login screen image. I did a Google search and found a solution that didn’t work for me. I have also read from forums that there was no way to change the image unlike the earlier versions of Fedora. I then had this idea of finding the image used as the login screen background and overwriting it with my preferred image. 
So I checked the /usr/share/backgrounds/ directory and found a “laughlin” folder. Inside it is a folder named “default” that contains three other folders named normalish, standard, and wide and a laughlin.xml file. The three folders contained the default login screen image.
If you open the xml file with a text editor, you’ll notice that a part of it specifies the path of the Laughlin wallpaper. Wide, Normalish, and Standard specifies the image dimensions. And using this xml file, we can change the login screen image.

                                             Laughlin XML File
Here’s what I did. First, I edited my image three times using the specified dimensions (this is optional) and saved them as PNG files. I then copied them to the three folders with respect to their dimensions.
Firstly go to super User and then follow the steps as per your need 

# cp /current/file/location/filename3.png /usr/share/backgrounds/laughlin/default/normalish/

Using vi, edit laughlin.xml and replace the filenames and save the file. See image below.

Edited Laughlin XML File
I logged off and there was my new login screen. 
Njoy the New login background

Saturday, February 12, 2011

Create a Yum Repository from ISO Images


For installing the packages from DVD after installing the Fedora from the Live Disk
You have to make local repository to list the packages on terminal through yum with offline mode
It means you don't need internet connection for installing the packages on installed fedora if you have Complete fedora DVD iso image 

Now you have to follow simple steps

1. Open the Terminal and go to the Super User by
       $ su

2. Make the backup of your repositories by
       # cp /etc/yum.repos.d/*.repo /home/________________ 
                                                                                 // Choose your suitable path
3. Delete or disable all the repos from the yum.repos.d
for delete
      #rm /etc/yum.repos.d/*.repo

4.Follow these commands
    make folder in /media by
          #mkdir /media/fed
          #cd /media/fed

5. Now mount fedora DVD and copy the whole content into this folder
          #cp -r * /media/fed
Note: check that all the files from the DVD is copied into /media/fed/ folder. If not then do it other wise it shows error

6.Now make the repo by
    #gedit /etc/yum.repos.d/fed.repo
Now Copy & Paste this in file fed.repo
[fed]
name=Fedora 13 DVD
baseurl=file:///media/fed/
enabled=1

save and close it

7. Now follow this
          #yum clean all
     #yum grouplist
Now you see the packages list on the terminal
so try to install packages in group by
     #yum groupinstall groupname

Njoy the offline installation on fedora with Yellowdog Updater Modified(yum)


Friday, December 10, 2010

VLC on Fedora 12/13/14

How to install VLC on Fedora X Y Z

Some of you who recently switched to linux or who are planning to switch to linux, are may be looking for a good media player which will play every thing on Linux, or looking for how to install VLC, This post is a step to step guide about installing VLC on Fedora 12/13/14
So, just follow the steps or copy - paste them to install vlc on your machine. It does not matter what architecture you are using - x86_64 or i686 or i386

Step 1:
$su -c 'yum localinstall --nogpgcheck http://download1.rpmfusion.org/free/fedora/rpmfusion-free-release-stable.noarch.rpm http://download1.rpmfusion.org/nonfree/fedora/rpmfusion-nonfree-release-stable.noarch.rpm'

Step 2: now run
    $su -c 'yum clean all'

Step 3: $su -c 'yum install vlc'

All set to go. VlC is installed successfully.


Just make me know if you get some error.

Monday, November 29, 2010

Skype in Fedora 14 X64


Install  Skype in Fedora14  64bit?
As we know, there is  no  Skype 64bit  available,
So here we use i686  packages to install skype in 64bit.
Our current system is :


[LINUX@fedora-home ~]$ uname -a
Output:
Linux fedora-home 2.6.35.6-48.fc14.x86_64 #1 SMP Mon Nov 29 15:36:08 
UTC 2010 x86_64 x86_64 x86_64 GNU/Linux
To install Skype 32 bit in a 64 bit system we need to install some dependencies using yum:
yum  install libXv.i686 libXScrnSaver.i686 qt.i686 qt-x11.i686 
pulseaudio-libs.i686 pulseaudio-libs-glib2.i686 
alsa-plugins-pulseaudio.i686  -y
Now  download  Skype  from official website and install the rpm package
rpm -ivh skype-2.1.0.81-fc10.i586.rpm
And now
Njoy SKYPE

Saturday, October 16, 2010

OS in Virtual Box on LINUX

How to install any Os in Virtual Box on linux ?

//To install operating system on virtual box just like a nested class

the procedure of installing operating system on virtual box which is installed on linux or windows both are nearly similar. There are many advantages of using Virtual Box like you dont have to use dual boot, you can play windows games on linux, you can test any OS with out really installing it, and some GEEKY reason: you can install an OS which doesnot support your current configuration so that you can use some specific version of any tool for example if you want to try ns1.xx then you will like to go for fedora core 4 or some thing like that for hastle free installation so try Virtual Box and many more. Here are the steps for installing any OS in Virtual Box, I am user of fedora but they are applicable to all the other distribution.

Step 1. Installed virtual box on linux machine (steps are mentioned in this post)

2. Iso image of windows xp or any other linux distro or any other version on windows which u want to install

Now the installation steps are as follows:

1. start virtual box

on fedora

>application>system tools>virtual box

2.After starting the Virtual box

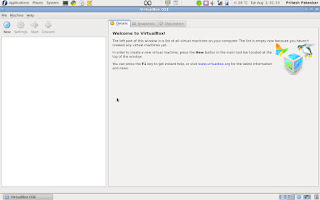
below screen is shown

 
then click on New option as shown
on clicking the new option you get the popup windoe of create New Virtual Machine 
on this click on next button . .


3. after clicking the next button
Give the name to the installation and select the OS type and the respective version for the installation

 
and select next
Now time to allcoate memory
here the main memory(RAM) allocation
allocate it with your requirement (minimun 256 MB)

 
and select next
4. After step 3
select create new hard disk in Boot Hard Disk(Primary Master)

 
and select next

 
and if you not get any error then again . select next.
5. Select the type of virtual hard disk you waqnt to create.

 
between Dynamically expanding or Fixed-size Storage and select next. 
6.Virtual Disk Locaion and Size
Press The Select button to select the location of a file to store the hard disk data or type a file name in the entry fild.


and click next.
7.
After this you are going to create a new virtual hard disk by clicking Finish.

 
8.you are going to create a new virtual machine by press the finish button

 
Now the pop up window will close after pressing the finish button

 
9. select the OS which is shown in left pannel and then select the setting of it.
And configure as shown in Image. 
GENERAL


SYSTEM
DISPLAY

STORAGE

 
In the Storage tree select "Empty"
After this in Attributes section CD/DVD Device select the "oprn virtual Media MAnager"
New pop up window will open in this select the "Add" and add the Browse the .iso image. and


And click OK button.


10. After this start the virtual OS
now the simple way of installing the windows XP or that u are installing
follow the simple OS installing steps.


After installation the OS. Njoy the virtual OS on your LINUX Distro.
One more thing, usually you do not need to install any additional driver after installing Windows Xp as they are built in virtual box. For rest , it varies from OS to OS.